How to Combine Data from Certain Sheets but Not Others into a Single Sheet
I need to copy everything from certain sheets but not others, allowing duplicate data…
What if you need to combine data from some sheets in your Workbook, but not all of them?
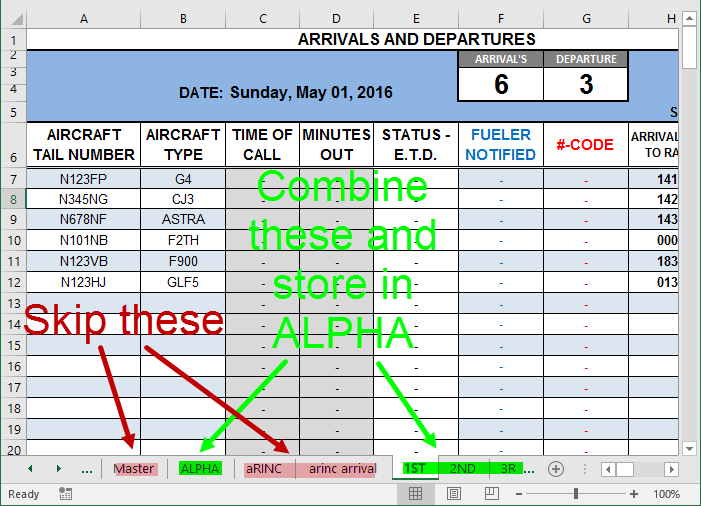
Suppose you have a Worksheet for each day of the month that you need to combine, but you need to skip all the other Worksheets — like this:
Easy peasy! We’re going to use the same technique implemented here, with more guards in the If statement to make sure those other Worksheets are not copied. Here goes:
Per usual, we are going to review this code using the 4-step VBA process:
Step 1 – Setup
Step 2 – Exploration
Step 3 – Execution
Step 4 – Cleanup
We get through Step 1 – Setup on lines 11-25.
First, on lines 11-12, we assign wksDst (the destination Worksheet) and lngLastCol (the last-occupied column for our data).
Line 12 takes advantage of LastOccupiedColNumInRow, a super-handy function from the VBA Toolbelt. You’re using the VBA Toolbelt, right?
Then, from line 16 to line 21, we initialize “ALPHA”, the destination sheet. If the last-occupied row on the destination sheet is greater than 1 (i.e. the header row), then we know some data already exists. In that case, we use the Range.ClearContents method to get rid of that data in preparation for adding the individual days’ data.
Finally, on line 25, we assign the initial destination range (rngDst) — and with that, our setup is complete!
Next up is Step 2 – Exploration, which runs from lines 29 to 46.
The For Each…Next loop that begins on line 29 allows us to iterate through each Worksheet, which is stored in wks. This means that on each cycle of the loop, wks will be set to a different Worksheet in the file.
First, we use the Worksheet.Name method to store the upper case name of wks in strName, which makes for a very easy-to-read next step.
We know that we need to skip any Worksheet that is not “1ST”, “2ND”, “3RD”, etc., so we check each name using a multi-line If statement in lines 34-39.
Assuming that wks is NOT one of the Worksheets to be ignored, Step 2 – Exploration wraps up on line 46. Here, the last-occupied row on the Worksheet is identified and stored as lngSrcLastRow.
Wahoo — exploration complete!
We then move into Step 3 – Execution, which runs from lines 50-59.
Using lngSrcLastRow, the last variable we assigned in the exploration step, we assign the data range to rngSrc on line 51.
In this particular example, we only want the values and formulas from each data Worksheet. With that as our guiding princple, lines 52-54 take care of the job.
- Line 52: Copy the source data using the Range.Copy method
- Line 53: Paste to the destination using the Range.PasteSpecial method, first sending over the values and number formats ONLY
- Line 54: Paste to the destination using the same method of #2 above, this time sending over the formulas ONLY
Nice!
Now that this particular Worksheet’s data has been copied to the destination, we need to update the destination range to match the new bottom of the data block.
This occurs on lines 58-59, where we use LastOccupiedRowNumInCol again (seriously, get the VBA Toolbelt), then set rngDst to reflect this new last occupied row.
Jackpot — that’s it for execution!
There isn’t much Step 4 – Cleanup to do in this case, so we simply let the user know all the data has been combined with a MsgBox on line 66.
And with that, we have successfully combined certain Worksheets while skipping others! In case you prefer video, here’s a 7-minute screencast walking through these steps:
Are you combining some and skipping other Worksheets with the best of them? If not, let me know and I’ll help you get what you need! And if you’d like more step-by-step, no-bullshit VBA guides delivered direct to your inbox, join my email newsletter below.


