
How to Delete Rows With Range.AutoFilter
How do I delete certain rows with Range.AutoFilter?
Deleting rows with a for loop is a great way to get started on your data clean up adventure, but what happens when you are working with a huge data set? Waiting 1+ second for every thousand rows gets old in a hurry, and like Ricky Bobby I wanna go fast.

Because it’s the fastest who get paid, and it’s the fastest who get laid
When you need to remove rows from a large data file you should use Range.AutoFilter instead of a For loop.
Let’s take on the same “delete rows with ‘Thumbs.db’ or ‘Invoice.zip’ challenge from last time.
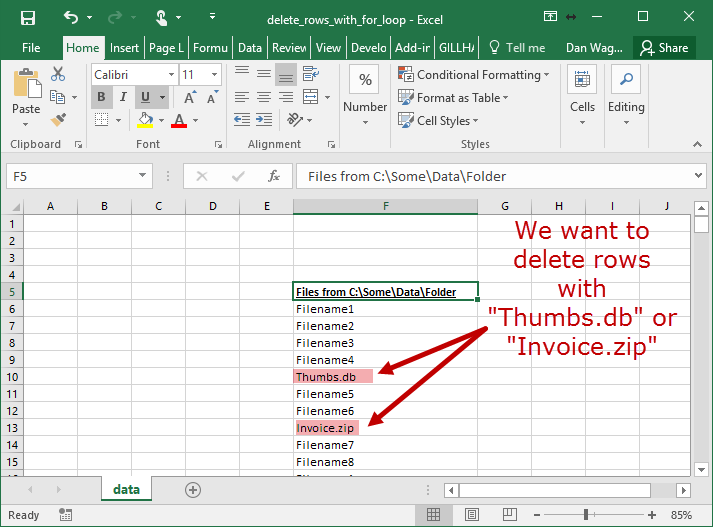
You need to delete “Thumbs.db” and “Invoice.zip” rows
This is how you will use Range.AutoFilter:
Let’s review the code above using our 4-step VBA process as a guide:
Step 1 – Setup
Step 2 – Exploration
Step 3 – Execution
Step 4 – Cleanup
The Step 1 – Setup here takes place on line 9, where we store the “data” worksheet as wksData.
Lines 12-15 handles the Step 2 – Exploration on this challenge. First, on line 13, we identify the last-occupied row in column F (where our data column is stored), and on the next line we set rngData to store the block of data from the header (in row 5) to the last-occupied row.
Here’s where things get interesting! The Step 3 – Execution phase takes place from line 19 to line 32. Let’s walk through this nice and slow:
- On line 19, we turn off Excel alerts (so the row deletion can occur without needing to click “OK” or “Yes” or whatever)
- Lines 24-27 applies that Range.AutoFilter magic:
- Field is the column you want to filter on relative to rngData (so we write 1 instead of 6)
- Criteria1 and Criteria2 are exactly what they sound like
- Operator is where we tell Excel that we want either “Thumbs.db” OR “Invoice.zip” (so we use xlOr)
Phew! We did a lot in those few lines, so let’s see what that looks like as the VBA is actually executing.
Range.AutoFilter In Slow Motion… Nice
Now that we have only the “Thumbs.db” and “Invoice.zip” rows visible in rngData, it’s time to delete them all in one swoop — and line 31 does exactly that. Again, since there is a lot happening in this one line, let’s review each piece:
- Offset(1, 0) shifts rngData one row down, which saves the header (but grabs an extra row at the bottom of the Range)
- Resize(.Rows.Count – 1) adjusts the last row of rngData up one (to get rid of the extra row from above)
- SpecialCells(xlCellTypeVisible) gets only the visible cells from the newly-resized rngData
- Rows.Delete deletes all of the visible rows
Damn yeah! Let’s look at how rngData is changing as the VBA is executing:

Each step in line 31, one at a time
Boom! The “Thumbs.db” and “Invoice.zip” rows have been deleted.
All that’s left is lines 36-44, which handles Step 4 – Cleanup. Lines 36-41 turns off the AutoFilter safely, and line 44 lets your user know that the rows have been removed.
So how does the Range.AutoFilter strategy compare to the For loop strategy?
Come on — you know the answer! Range.AutoFilter is fast as hell (an order of magnitude faster for that matter) and is easy to read too. If you want to see the two side-by-side, check out this 5-minute breakdown on a recent Stack Overflow question: