
How To Delete Rows With a For Loop
How do I delete certain rows with a For loop?

This is me when my For loop is deleting the WRONG rows
If you’ve been working with Excel and VBA for more than two seconds you have probably needed to delete rows that meet a certain criteria. It makes sense! Cleaning your data file by removing bad rows makes analysis and reporting a cinch.
Let’s say you have a column that lists files in a certain folder, and you want to remove the “Thumbs.db” and “Invoice.zip” rows like this:
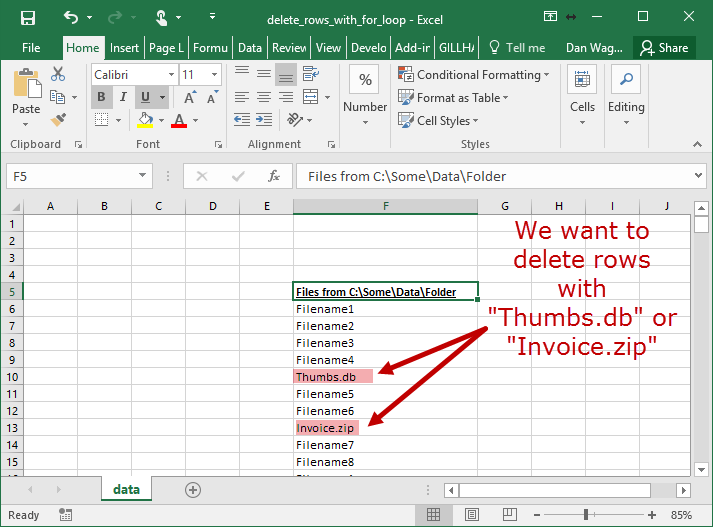
You need to delete “Thumbs.db” and “Invoice.zip” rows
Easy cheesy, right? Just run a For loop from the top to the bottom, deleting rows as you go, right? Wrong.
If your loop runs from 6 to the last row deleting rows along the way, your For loop index will get out of sync with the row numbers in your sheet after the first deletion.
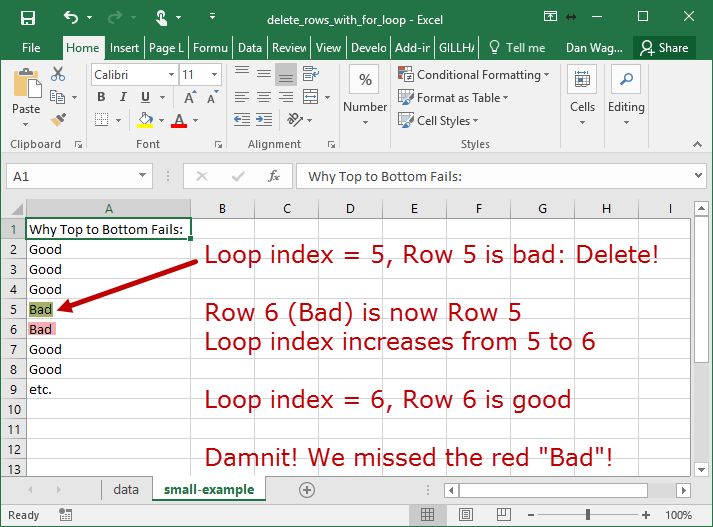
This is what happens when your For loop starts at the top and works down… you will probably miss bad rows!
Argh! Every time you delete a row, the index increases — which means you might miss a bad row.
The fix is to work backwards, with your For loop starting at the bottom and working up to the top:
Let’s review the code above in the context of the 4-step VBA process:
Step 1 – Setup
Step 2 – Exploration
Step 3 – Execution
Step 4 – Cleanup
Since this is a small example, the Step 1 – Setup phase is handled entirely by line 8. We create a Worksheet variable for the “data” sheet, which will come in handy down the line.
Step 2 – Exploration happens on line 12, where we identify the last-occupied row in column F. This sets our loop limit.
Lines 15-19 handles Step 3 – Execution. We start our For loop at the BOTTOM (i.e. lngLastRow) and iterate backwards to 6, which is where the data starts. Line 16 checks to see if the value in column F is “Invoice.zip” or “Thumbs.db”, and line 17 deletes the row if true.
Finally, we let our user know that the script has finished on line 23, which covers our Step 4 – Cleanup.
Phew! Not only are you deleting rows with a For loop like a champ, you now understand why looping from top to bottom will probably fail. You’re off to a great start!
Next, we’ll take this same example and learn about an even BETTER way to delete bad rows.