
How to Transpose Horizontal Data to Vertical Data for Easy Pivot Tables
How do I transpose data from horizontal to vertical to get it ready for a pivot table?
Pivot tables… gotta love ’em. But sometimes your source data just does NOT make sense for a pivot table — and when that’s the case, you need to take matters into your own hands.
Suppose your raw data looks like this:
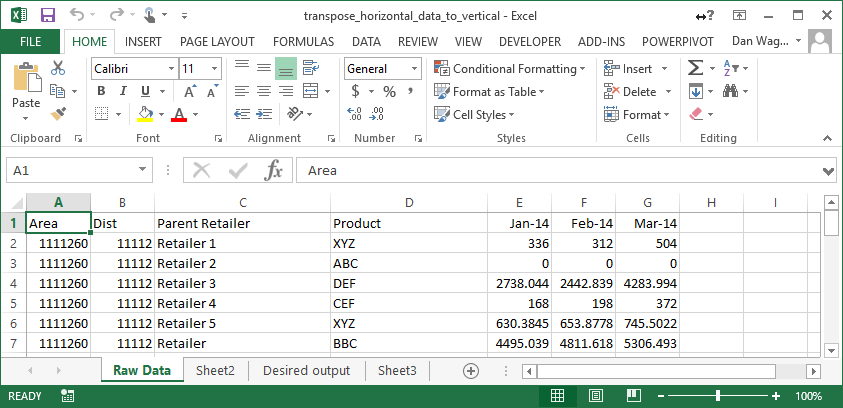
Our example data
In order to leverage a pivot table here, though, you need to merge the month values (let’s call them “volumes”) into a single column, with the details from the row repeated for each value. In an ideal world, your data would look like this:
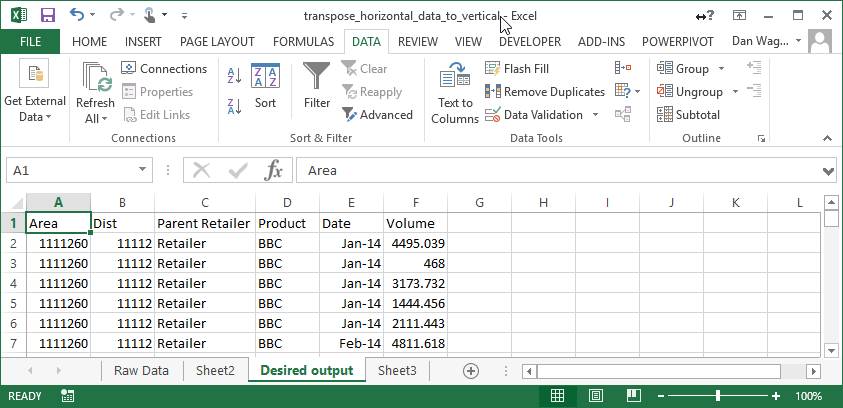
This is the way we WANT our data to look
When life gives you lemons, you make lemonade — and VBA is a hell of a lemonade-maker. Before we dive into the code, though, let’s see it in action:
This is our horizontal-to-vertical converting, pivot-preparing macro in action
This script copies the row details, pasting in each month and volume, resulting in an easy-to-pivot block of data. Nice!
One important thing, before we dive into the script itself. This macro relies on Scripting.Dictionary objects, which are not enabled in VBA by default. In order to make them accessible, you need to:
- Click “Tools” > “References” from the VBA Editor window.
- Select the “Microsoft Scripting Runtime” option
- Click “OK”
Enabling the Scripting.Dictionary object for use in VBA
Boom! You now have access to the Scripting.Dictionary, one of the handiest VBA objects around. The Scripting.Dictionary object is a lot like the Collection object, except it has some extra functionality built in. (You can learn a ton about the Scripting.Dictionary object from this Stack Overflow post.
With that out of the way, we can get into the good stuff:
Let’s review the above using the always-handy 4-step VBA process:
Step 1 – Setup
Step 2 – Exploration
Step 3 – Execution
Step 4 – Cleanup
Lines 13-23 handle our Step 1 – Setup. First, we assign a Worksheet reference to the “Raw Data” sheet, wksInput. Then we create a new Worksheet reference, where we’ll write the resulting data table, and add headers while we’re at it. Finally, set the starting output row number for the wksOuput sheet in variable lngTargetRow.
Step 2 – Exploration takes place from lines 26-32. In this case, all of the exploration actually occurs on the “Raw Data” sheet, wksInput, so the whole of this step happens inside a With wksInput...End With block:
lngLastRowpicks up the last-occupied row numbervarDetailNamesis aVariantArray, holding the headers from cellA1to cellD1varMonthNamesis anotherVariantArray, holding the headers from cellE1toG1
And that’s it — Exploration complete.
Lines 35-82 handle the Step 3 – Execution, which is the bulk of our macro. There’s a lot in this section, so let’s break it into bite-size pieces…
The outermost loop, which uses lngIdx to iterate through the occupied rows on the “Raw Data” Worksheet, does some setup on lines 37-47. dicDetails and dicValues are initialized and set to new Scripting.Dictionary objects, and two new Variant Arrays are created:
varDetailscontains the details (like “Area” and “Dist”) for this rowvarValuescontains the values (like 336, 312 and 504) for this row
These two Variant arrays come in handy on lines 51-52, where we call a custom function: CreateDictionaryFromRowArrays. That function is defined and implemented on lines 89-99.
CreateDictionaryFromRowArrays takes Variant Arrays and assembles them into a Scripting.Dictionary, which is exactly what we need in the next step.
Since we want to write the same details (like “Area” and “Dist”) for each value (like 336, 312 or 504), we start by looping through the Keys of the Values dictionary, dicValues, on Line 57. Makes sense, right? We want each value stored in dicValues to be on its own row, so we want that to be our outer loop. (Advanced readers are probably guessing that we’ll be using dicDetails in our inner loop, and that’s EXACTLY our next step.)
Line 63 starts our inner loop, where we write the dicDetails out to each row. Immediately after, on lines 69 and 73, we write the dicValues (which contains one month and one value) out to the same row. Once that is complete, we move on to the next month / value pair inside dicValues, which again is our outer loop.
And that’s it for Step 3 – Execution! By cleverly structuring our Scripting.Dictionary objects, we can write loops that make short work of our horizontal-to-vertical transformation duty.
Finally, line 85 is our one-line Step 4 – Cleanup section, which simply throws the user a message letting him or her know the script is complete. Easy cheesy!
And now, we can whip an unruly data file into a neat, vertical structure that’s primed for analysis with a pivot table. Sweet!