
How to Move Data from Input Sheet to Variable Sheets Based on User Input
How do I move data from one sheet, an input, to a destination sheet picked by the user?
Here’s a challenge that comes up all the time — you built a Workbook with an “input” sheet that lots of people are using. After they enter values on the “input” sheet, they can select where they would like that data to be written by clicking a button, then POOF it moves to the destination they selected.
Here’s what it looks like:
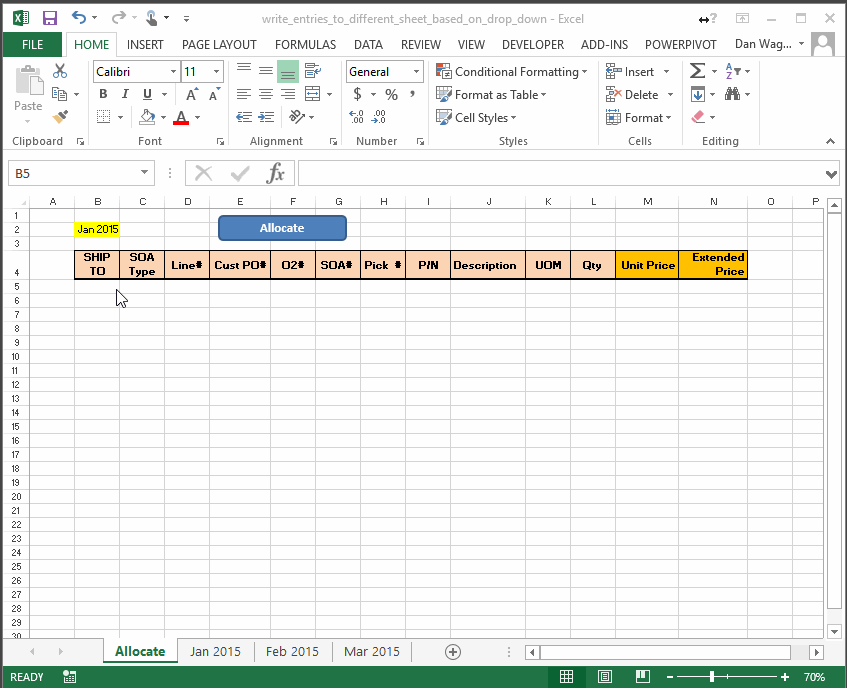
Here’s how our data mover works
But hey, you might be saying… What if the user picks a month for a sheet that does not exist? Like “Aug 2015”? Well, in that case we have some protection built in:

Here’s what our script responds with if the user picks a sheet that does not exist (yet)
Nice! Here’s the code that makes it all work:
We will review this macro in the context of our 4-step VBA process, which goes like this:
Step 1 – Setup
Step 2 – Exploration
Step 3 – Execution
Step 4 – Cleanup
As always, we begin with Step 1 – Setup, which is short in this case and only runs from line 12 to line 15. We simply assign the wksAllocate variable to reference the “Allocate” Worksheet, then we collect the user’s drop-down selection and store it in strInput.
The Step 2 – Exploration takes place from line 18 to line 45 and actually accounts for most of this macro. Let’s break it down:
Lines 18-28 make sure that the user’s selection is a Worksheet that exists. We accomplish this by assigning that Worksheet, inside an On Error Resume Next...On Error GoTo 0 block, to an Object. If that assignment results in an error (which is contained in the VBA global variable Err) then we know that Worksheet does not exist — which results in a handy warning message displayed to the user rather than a runtime error.
Once we confirm that the destination Worksheet exists, we assign it to wksTarget on line 31.
Lines 34-39 continue the Step 2 – Exploration by identifying the last-occupied row and column on the “Allocate” Worksheet. Here, we are taking advantage of two functions:
LastOccupiedRowNum(lines 56-69)LastOccupiedColNum(lines 72-86)
These functions do EXACTLY what their names suggest — they return a Long, which represents the last-occupied row or column on the passed-in Worksheet.
(Side note: determining the last-occupied row and last-occupied column on an arbitrary Worksheet is, in my experience, a cornerstone of VBA programming — these handy functions should be a part of any VBA application you are working on.)
Back to lines 34-39. Finally, we assign the Range of data that we would like to cut from the “Allocate” Worksheet to rngAllocate on lines 36-39.
Finally, the last section of Step 2 – Exploration occurs on lines 42-43. Here, we determine the last-occupied row on the target Worksheet, then create a target “destination” Range (rngTaget), which is one row below the last-occupied row on the target Worksheet.
Whew! On to Step 3 – Execution, which is actually a one-liner! Line 46 cuts the data from the “Allocate” Worksheet and pastes it to the destination Worksheet by using the rngTaget we set up on line 43.
Finally, our Step 4 – Cleanup occurs on line 49, where we present the user with a message letting him or her know that the data has been successfully moved.
And with that, our data mover is complete!