
How to Create Zip Files with VBA using 7-Zip
How can I create zip files with VBA?
VBA is more flexible than people give it credit for — did you know that, for example, you can control 7-Zip with VBA?
This example uses the 64-bit version of 7-Zip, which is installed to the default location (C:\Program Files\7-Zip\7z.exe). No tricks up our sleeve there!
The list of folders to archive starts in J7, and we want the macro to stop when it comes to a certain string (“Arbitrary Stop String” in this example, haha) or row 50, whichever comes first. We want the zip files to end up in a different folder too: **C:\target-folder**.
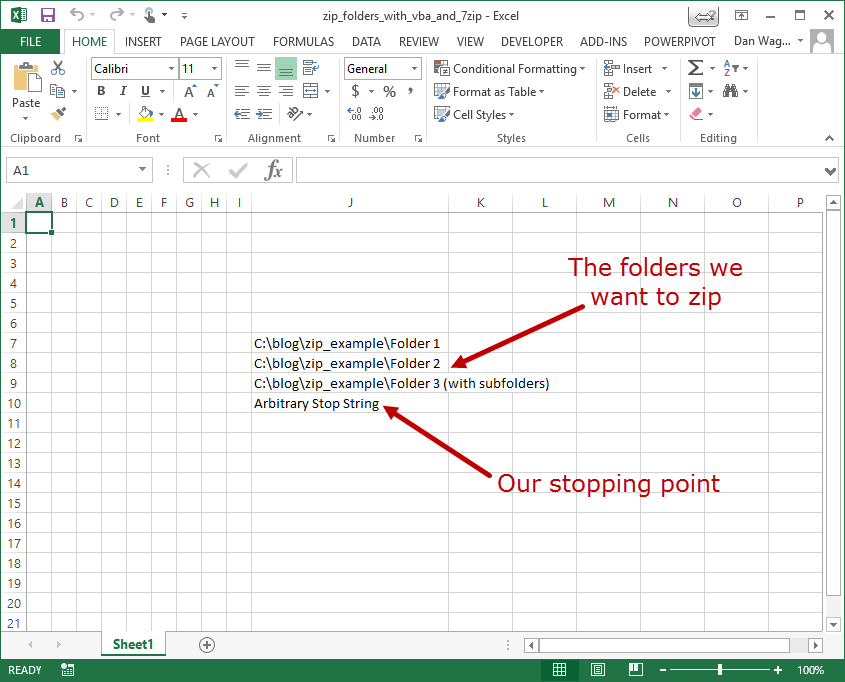
Our Excel file with target folders and a stop point
The code below will get the job done:
Using the trusty 4-step VBA process, let’s review how it works:
Step 1 – Setup
Step 2 – Exploration
Step 3 – Execution
Step 4 – Cleanup
We start with Step 1 – Setup, which takes place from line 13 to line 17.
- blnEndFound is set to False, which will come in handy later as we loop through the folders
- lngIdx, which is our counter, starts at 7 (because the folder info starts in row 7)
- strTargetDir is assigned to the target folder where we want our zip files to end up
- strEndFound is the string that will stop the loop
So far, so good — our setup is complete!
Step 2 – Exploration takes place inside the While…Wend loop on lines 23 through 36.
- strFullPath gives us the full folder path from the sheet
- lngIdx is a counter variable, which we increment by 1 each time
- If the full folder path is NOT our stop string (strEndFound) and our counter is NOT 51 or greater, we have some zipping to do
On line 30, we assign strZipName with a function called GetZipFileName. It’s a custom function, so let’s review that code (which runs from line 56 to line 84).
In a nutshell, the purpose of this function is to return the name of the zip file. The way we will determine that name is by walking backwards from the end of the full folder path, stopping when we get to the “\” character. Once that position has been identified, we’ll take all the characters to the right of the “\” and add “.zip”. Easy cheesy!
- str, on line 68, is always a single character, and by incrementing lng we walk backwards from the end of the input string (FullPath)
- If str equals “\”, we know we have found what we need for our zip file name, and so we break the While…Wend loop by flipping blnCharIsASlash from False to True
- Lines 75-79 are a guard against infinite looping, which can happen by mistake in a While…Wend loop (we set the arbitrary limit at 1000)
Finally, on line 82, we assign the output of the function to be all the characters to the right of the “\” with “.zip” appended to the end.
Phew! Now that we have the name of the zip file saved, let’s get back to the process of zipping!
Lines 33-36 wrap up the Step 2 – Exploration portion of our script, and all four of these lines revolve around creating the String that we will launch from the command line. This assignment looks pretty intimidating, but by going through it step-by-step you’ll see that it is not all that scary.
- Chr(34) is the double quote character, which is essential for command line instructions. If there is a space character anywhere in a String that you’ll be running from the command line, you need to wrap the String in double quotes!
- “C:\Program Files\7-Zip\7z.exe” is the 7-Zip executable file
- ” a -tzip “ tells 7-Zip to archive (“a” -> “archive”) in zip-format (“-tzip” -> “zip”)
- strTargetDir is assigned on line 16 — it’s the place we want our zip file to end up
- strZipName is assigned on line 30 — it’s the zip file name that we determined using the GetZipFileName function
- strFullPath is assigned on line 23 — it’s the folder that was indicated in our spreadsheet
- We add a “\” and “*” character to the end of the strFullPath folder to let 7-Zip know that we want to archive ALL files in the folder
Nice! If we were to Debug.Print our strCommand variable for the first run in this sheet, it would look like this:
“C:\Program Files\7-Zip\7z.exe” a -tzip “C:\target-folder\Folder 1.zip” “C:\blog\zip_example\Folder 1*”
With this String identified, all that’s left to do is execute.
Step 3 – Execution takes place from line 39 to line 45, and it all revolves around the WshShell object, which is stored as wsh in our script.
On line 39, we assign lngErrorCode (which will be a number) to the output of wsh.Run with three inputs:
- strCommand is the full command line text that we created from lines 33-36
- WindowStyle:=1 tells wsh to show the command window (If you want the window to be invisible, you would write WindowStyle:=0 instead)
- WaitOnReturn:=1 tells wsh to halt the script until the command line finishes (If you don’t need your script to wait, you can instead write WaitOnReturn:=0)
If the command was successful, lngErrorCode will be 0 (zero). We check explicitly from line 42-45 for a successful run, and Exit Sub if something goes wrong.
Finally, Step 4 – Cleanup is an easy one-liner — we simply need to let the user know our script is done! On line 53, we use MsgBox to indicate that the macro has finished and that the Zip files were created.
Here’s the script in action:
Pat yourself on the back — you can now create Zip files from Excel with VBA and 7-Zip!