
How to Copy Data to a New Workbook Based on Dates
How do I copy data between two dates from one workbook to a new workbook?
Suppose you have a “master”-type workbook that contains ALL the data for all the dates, spread out amongst many sheets, like this:
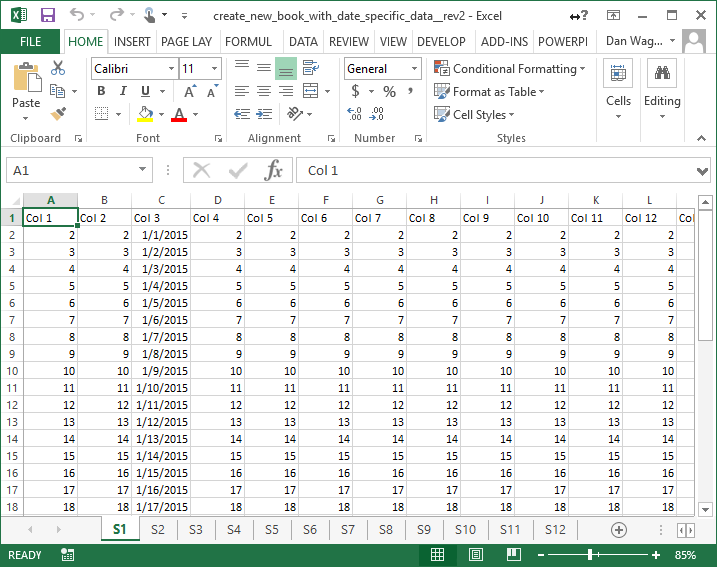
Raw Data for ALL dates, spread out onto 12 different sheets
You don’t necessarily need all that data for your analysis — in fact, you are only interested in certain small date range subsets, like, for example, everything that happened between January 5 and January 10:
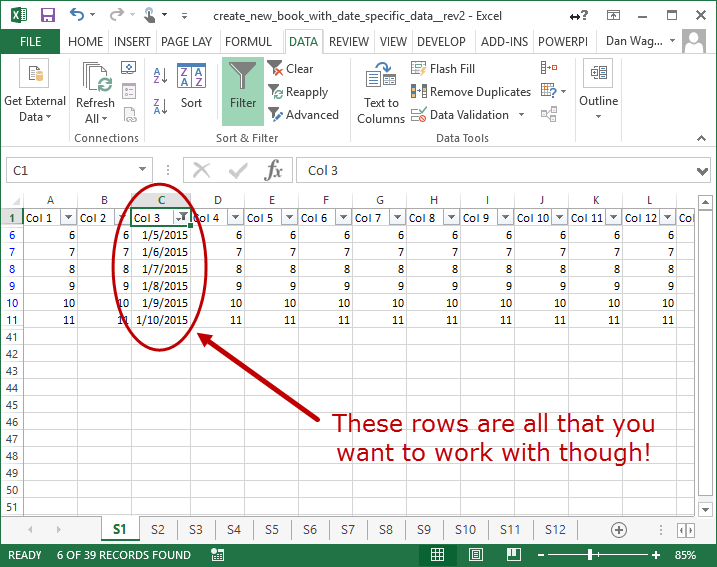
This is the only block of data you care about on each sheet
How can you get that specific date range of values from each worksheet in a new workbook? You certainly don’t want to filter each sheet by hand… that would take forever! Let’s crack this nut with VBA:

Our macro in action, creating a “subset” workbook with date limits
Woo! Here’s the code that gets it done:
Let’s walk through this 2-part code using our 4-step VBA process to guide the way:
Step 1 – Setup
Step 2 – Exploration
Step 3 – Execution
Step 4 – Cleanup
The first subroutine, PromptUserForInptDates, is short but sweet. There is no Step 1 – Setup, Step 2 – Exploration or even Step 4 – Cleanup necessary! It’s all execution here, and beyond that it’s essentially a repeat.
Lines 9-17 prompt the user to input the start date as a String then validate what was entered. For example, if the user puts a non-date into the box, our subroutine will catch the problem and exit instead of creating an error:
This is what happens if your users enters an invalid date
Nice! Unhandled errors are scary to users, and this is a place where we can easily guess what mistakes might happen, so it’s a good idea to go ahead and handle them.
Lines 20-28 do the same thing as lines 9-17 — this time, we get the end date as a String (instead of the start date).
Finally, line 31 calls the CreateSubsetWorkbook subroutine, using the validated-strings we just obtained — now it’s time for the fun stuff!
In a lot of ways, the whole subroutine above PromptUserForInputDates handled MOST of our Step 1 – Setup, but lines 44-45 take care of the final bit. We know the dates are in column C, so we assign lngDateCol to 3. Then, we create a new Workbook and assign it to wbkOutput.
Our Step 2 – Exploration begins inside the loop that we kick off on line 48, which iterates through all the Worksheets inside ThisWorkbook.
First, on lines 52-53, we create a new Worksheet and assign its name to be the same name as the corresponding sheet in ThisWorkbook. Next, on line 57, we create a “target” Range, which is where we’ll paste our filtered data. Then, lines 62-66 find the last-occupied row and column on the sheet, and line 67 assigns the entire data block to our rngFull variable. Woo — now we’re ready for the amazing, built-in Range.AutoFilter method!
Lines 71 through 80 are where the magic happens. We apply the AutoFilter to rngFull, with the following configuration:
Fieldis the column we’re interested in, which we know is 3 (i.e.lngDateCol)Criteria1, which is the first condition we want applied torngFull, we set to a concatenation of">=and theStartDatestringCriteria2, which is the second condition we want applied torngFull, we set to a concatenation of"<=and theEndDatestring
This gives us a nicely-filtered set of visible cells, which we assign to a “result” variable (rngResult) on line 78. Finally, we copy rngResult to rngTarget, which we set in the beginning of our loop. Boom!
Since we do not want to leave the filters on, lines 83-86 clear all AutoFilter states safely.
Step 4 – Cleanup happens on line 91, which we let the user know that our data has been transferred to the new file.
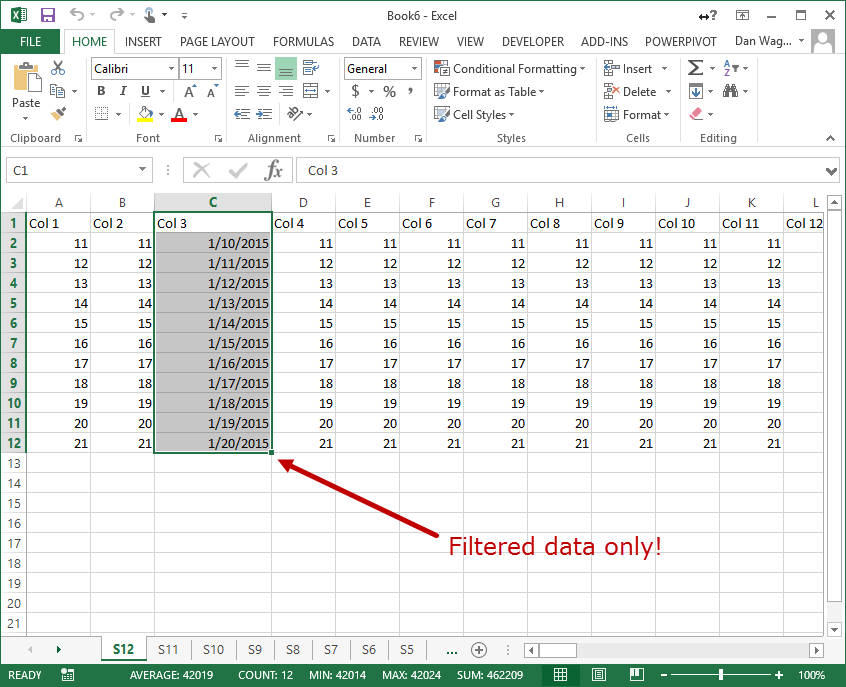
Our resulting workbook has the right date range ONLY
And with that, we’re done!