Deleting Blank Rows in a Variable Range with VBA
What should you do when you need to delete blank rows, but you don’t know exactly how many columns or rows your data range will have?
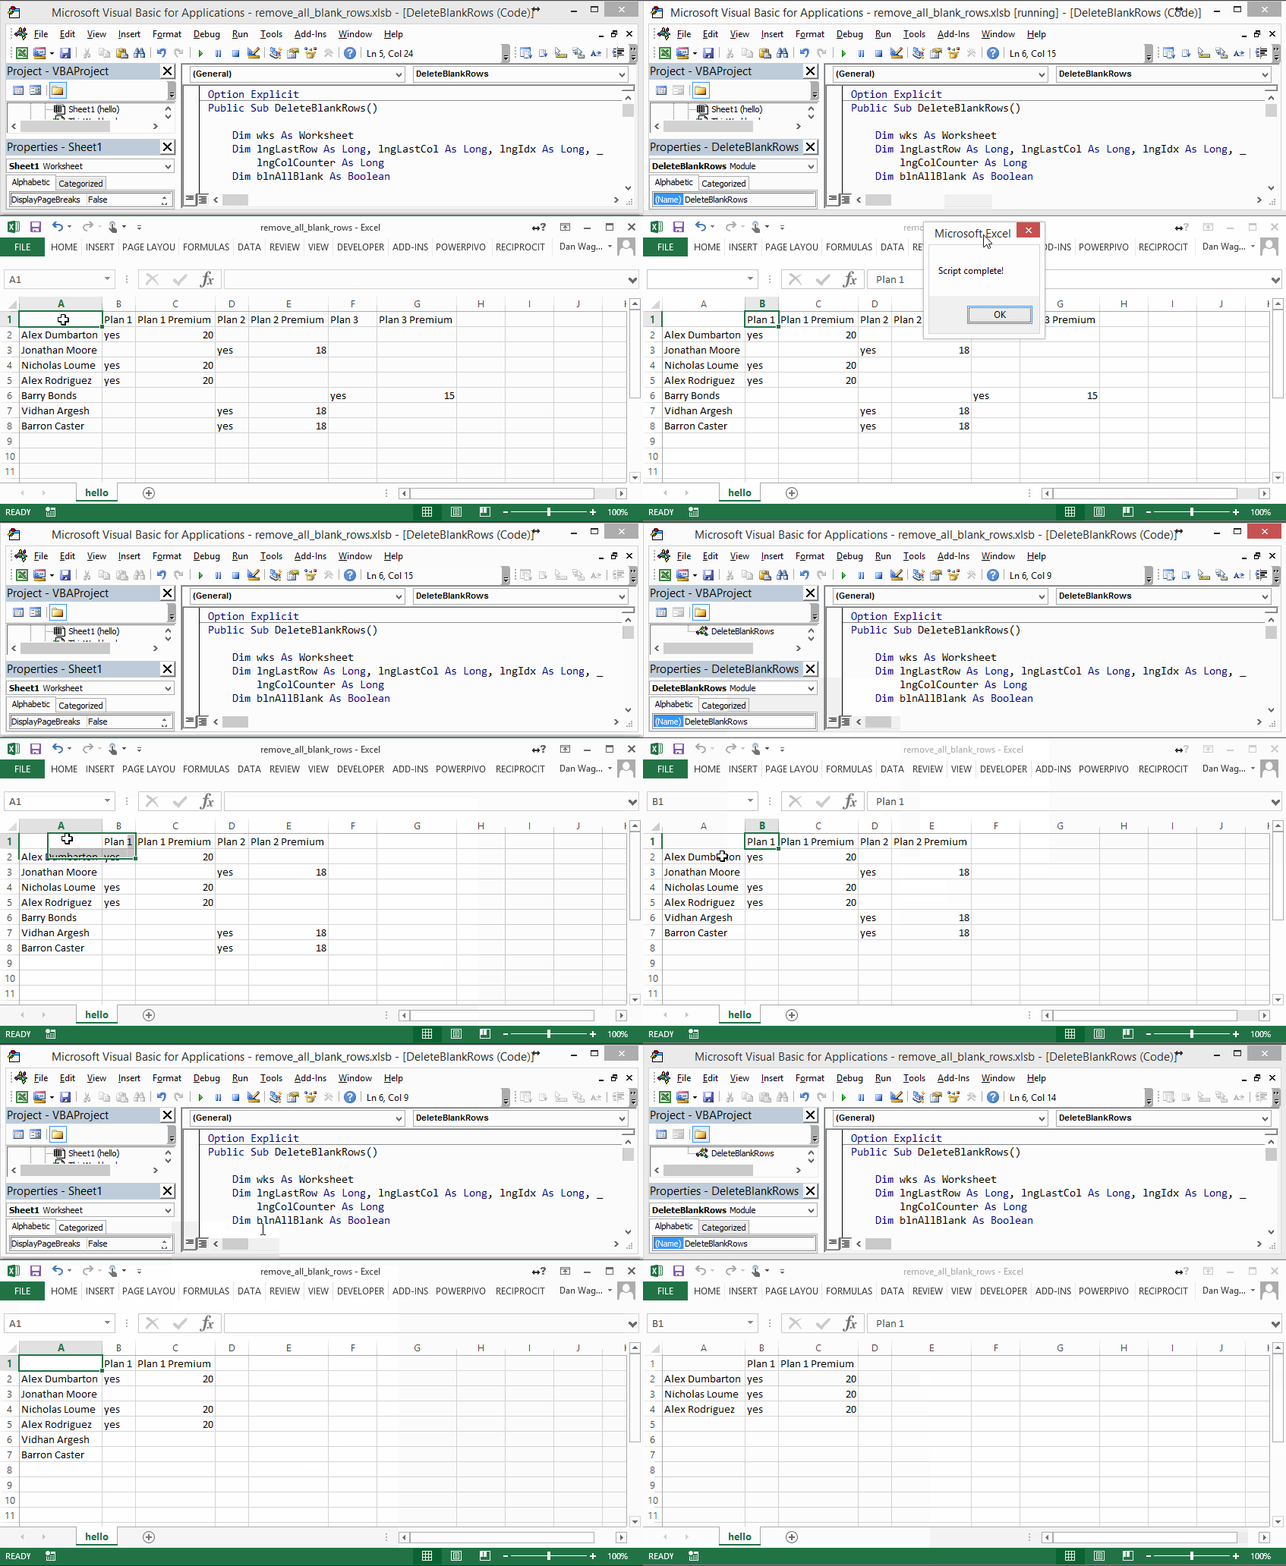
The GIF below walks through 3 differently-sized data ranges. In the first run, there are NO blank rows, so nothing happens. Nice! The second run looks at a smaller range, and in this case the Barry Bonds row is now empty — so that row gets deleted. Finally, the third run looks at an even smaller range, where Jonathan Moore, Vidhan Argesh and Barron Caster are all now blank — and each row is deleted as such. Flexibility y’all!
Here’s the script in its entirety:
This macro, like just about all of my macros, follows the 4-step VBA process:
Step 1 – Setup
Step 2 – Exploration
Step 3 – Execution
Step 4 – Cleanup
Lines 4-10 handle Step 1 – Setup, where we declare variables and establish the Worksheet we will be operating on.
Lines 12-20 are our Step 2 – Exploration section. Even though dynamic spaces can be hell on your brain, you can actually make short work of them in a situation like this with two simple variables: the last row and the last column. Here, we find them and assign them to lngLastRow and lngLastCol.
The last row (lngLastRow) sets the limits for our “outer” loop, where we’ll navigate through the rows. The last column (lngLastCol), on the other hand, sets the limits for our “inner” loop, where we’ll navigate through the columns.
Lines 25-51 are the Step 3 – Execution here. There’s a lot happening here, so let’s break it down:
For lngIdx = lngLastRow To 1 Step -1
This is our “outer” loop, which navigates the rows. WHEN IT COMES TO DELETING ROWS ONE-BY-ONE, YOU ALWAYS NEED TO START FROM THE BOTTOM AND WORK YOUR WAY UP. Looping from top-to-bottom will leave you in a world of hurt, as the For loop counter will be off as soon as you delete the first row.
The next two lines initialize two variables for use in our “inner” loop: blnAllBlank, which we’ll use to flag non-blank cells, and lngColCounter, which we’ll increment as we walk through the columns in the row.
The next line kicks off a While loop, which is perfect for situations like this where we have multiple break conditions:
While blnAllBlank And lngColCounter <= lngLastCol
Let’s dissect that.
First of all, if we encounter a cell that is NOT blank in a row, we can break this loop immediately — right? We only want to delete rows that are entirely blank, so the presence of a single NON-blank cell means that row should not be deleted.
The second condition checks to make sure that we are never examining cells beyond the last-occupied column number, which is stored in lngLastCol. This check ensures that our While loop does not go on forever! The loop will always quit when the lngColCounter exceeds the lngLastCol.
Inside the While loop, we’re running an If statement that checks whether or not a given cell is empty. If the cell IS empty, we increment our column counter (lngColCounter) by one.
Once the While loop finishes, we have one last If, and this is where we delete the row (or not). By looking at the blnAllBlank flag, the decision is easy — if the blnAllBlank flag is True, we know that everything in the row is blank and the row should be deleted! Otherwise, we move up to the next row.
Finally, line 54 is our one-line Step 4 – Cleanup, where we simply notify the user that the script has finished. Easy cheesy!

