Combining Many Excel CSV Files Into One Part 2
What should you do when you need to combine many Excel files (CSVs, XLSXs, TXTs, whatever) into one “master” file?
Part 2 of a 3 Part Series (Part 1) (Part 3)
Welcome back! Since Part 1, you have set up a handy folder structure and written your high-level, “ideal world” code. Let’s get to work on the ImportAllDataFiles subroutine!
Per usual, we’re going to adhere to the 4-step VBA process:
Step 1 – Setup
Step 2 – Exploration
Step 3 – Execution
Step 4 – Cleanup
Lines 4-23 handle the Step 1 – Setup. We’re mostly just dimensioning variables here, but lines 18-20 are a bit more interesting than that.
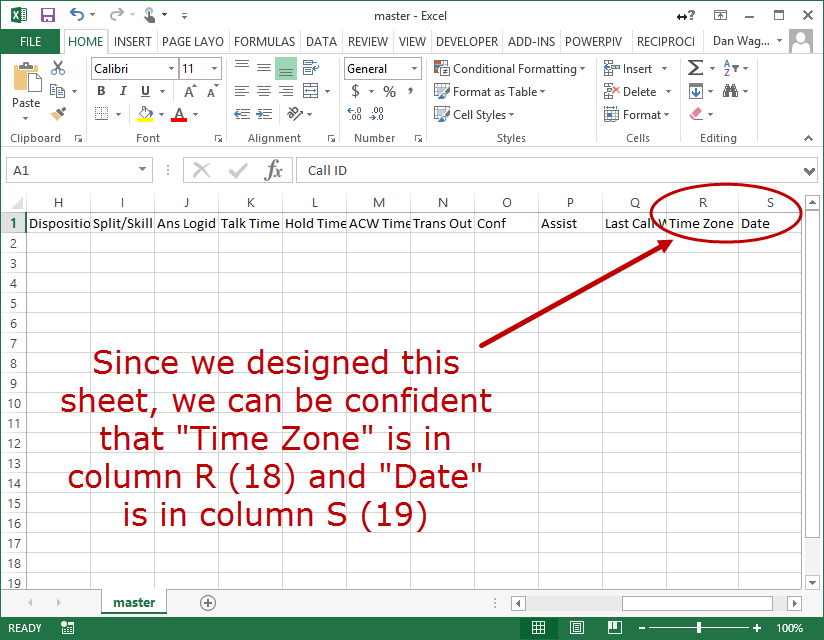
We first assign the master worksheet to a variable for easy access, then we identify the columns that will contain our “TimeZone” and “Date” data. Usually, this kind of up-front column assignment is not a good idea, but since we are in charge of the master sheet, we can assign these columns with confidence.

Boom — since we’re in charge of Master, we can be 100% sure about those tricky columns, “Time Zone” and “Date”
Finally, we use the Dir function on line 23 to feed our loop through the directory.
Since this subroutine relies on the interaction between the master sheet and each CSV, the Exploration and Execution steps bounce back and forth from line 26 through line 108, so let’s walk through each section and identify exactly what’s going on.
Lines 30-38 are doing some Exploration. We identify the last-occupied row on the master sheet (which will change every time a new block of data is appended from a CSV), and with the last row we assign a Range variable. rngDestination will make our copy / paste action much easier down the line.
Lines 41-56 should also be considered Exploration, this time focused on the CSV. We identify the data range (NOT including the headers, since we set that up already in our master file) then set it to another Range variable. rngSource now contains all the data we want to move from the CSV to the master sheet.
Line 60 is our super-simple Execution. The Range.Copy method makes moving data from one Range to another Range really easy — all we have to do is specify the Range to be copied and the destination!
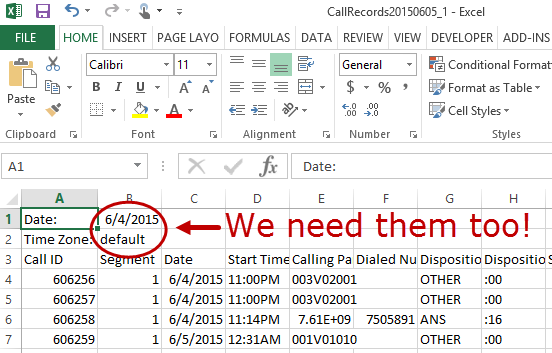
Lines 63-82 begin our next round of Exploration, this time focused on getting that pesky “TimeZone” and “Date” data from the CSV:

The “Date” and “Time Zone” values only show up once, but we want them to run down the entire column in the master file
We want to write the “TimeZone” and “Date” data into columns at the far-right end of the original data block in the CSV, which will make pivoting the master sheet a breeze down the line.
Since the data blocks coming from each CSV have the potential to be large, this implementation uses Variant arrays, similar to what we did when we needed to create a column based on a different column.
First, on line 73 and line 79, we do some more Step 2 – Exploration and establish Range variables representing the space on the sheet that we want to fill with the “Time Zone” and “Date” info, then on lines 86-87 we create Variant arrays to match (varTimeZoneCol and varDateCol).
Next, we continue our Exploration get the actual “Time Zone” and “Date” values from the CSV on lines 90-91.
Don’t let the Step 3 – Execution lines (94-97) confuse you — we are simply making EVERY element of the Variant arrays equal to the “Time Zone” or “Date” value. I wish there was a better way to do this, but as far as I know there isn’t — argh!
The final Execution step happens on lines 100-101, where we write the Variant arrays back to the Range columns for “Time Zone” and “Date”.
With that, the CSV data has been completely extracted!
Finally, lines 106-107 close the CSV and adjust the target of Dir, which is Step 4 – Cleanup in preparation for the next CSV file.
Lines 111-112 handle the final Cleanup, where the user is alerted that the data has been merged in and the master has been saved.
Pat yourself on the back, because you just wrapped up Part 2!

